Hello,
 |
Here is a photo of Gelsey Kirkland with her hair in a low ballet bun. This photo was taken from: http://mikaelasjetsetbeauty.blogspot.com |
To all of you who have read my last post, thank-you for waiting ever so patiently for my post on Frederic Ashton. Unfortunately I must delay this subject for a little bit longer, I will not be writing about this wonderful man, for I've got a more important, and substantial topic to cover on this fine day. It may seem very subtle and not very important, but in most cases it portrays what kind of dancer you are: the simple yet very distinguished ballet bun. I have divided the essential steps to make a ballet bun into 6 compartments:
1) Combing the hair into a ponytail.
2) Combing back the hair and gelling it once it is in the ponytail
3) Twisting the bun
4) Placing the hairnet on the bun
5) Pinning the bun
6) Hairspraying and adding any accessories that you want onto your hair
I will explain these steps in great detail very shortly and adding photos to demonstrate VERY clearly how to do a proper "Ballet Bun" but first of course I must tell you the equipment you will need to accomplish this very hard mission. You will need 10-20 hairpins (big and or small) preferably bunheads if you want the big type, they must also match your hair. You will also need a hair elastic, or two if your hair is very thick, again it would be best if these elastics matched the color of your hair. You will need 1 hairnet that matches the color of your hair (prefferebly bunheads). And finally you will need a hair brush, a fine tooth comb and hairspray and gel.
 |
This is what your ponytail should look like. This photo was taken from: http://www.xiongdudu.com |
Step 1) Combing the hair into a ponytail. To complete this step you will need a hairbrush, gel and a fine tooth comb. To start brush out your hair so there is no part. Then start bringing up the back of your hair on the back of your head into a ponytail on the top of your head. Keep hold of the ponytail and squirt some gel onto your hand, or if you have the spray kind, spray plenty on (water will also work as a replacement for gel, as long as your hair gets damp enough). Once enough gel is on your head so that your hair is damp, start combing your hair into the ponytail held by your hands so that there are no more bumps. Once you feel that there are no more bumps that you can see (because there will always be bumps), wrap the elastic 2-4 times around the hair creating a secure ponytail. Divide your hair into two and pull the two strands in different directions, tightening the ponytail.
Step 2) Combing back the hair and gelling it once it is in the ponytail. To complete this step you will need a fine tooth comb, gel, and hairspray (and maybe some clips if you want). There will surely be bumps in your ponytail, no matter how hard you tried to get them all in (they're nasty little critters), so this step tries to get get rid of the most possible. To start, take your fine tooth comb and comb all the bumps back into the centre of the ponytail, then take your clips or clip and try to clip as many bumps as you can down, don't worry, if you don't have a clip just make sure you use lot's of hairspray so they stay in place. This is the point where your bun will look it's worst, don't panic if there is a lot of bumps on the centre of your head near the elastic. Now take your gel and hairspray and use as much as you feel comfortable using to make sure those bumps in the centre of your head stay there. Now you are ready to start the "bun".
 |
This what your bun should look like while you're twisting the bun. This photo was taken from: http://www.xiongdudu.com |
Step 3) Twisting the bun. To complete this step you will need 1 or 2 bobbypins. To start divide your hair into 2, 3, 4 or even 22 strands of hair. Now take the one farthest on YOUR right, not the mirror's and twist it. Once you have twisted it loop it over the elastic so that it is now beside the strand of hair farthest on your left. Do that with every strand of hair, form right to left until all have been twisted and looped over the elastic. Once you're finished gather all the hairs together and create one big strand of hair, take this and loop it around the other twists son it is beside them, NOT on top or below them. You may have to loop this once or many times depending on the length of your hair. Once you have finished this place a bobby pin at the end of the large loop of hair so that the bun does not come apart.
Step 4) Placing the hairnet in the bun. To complete this step you will need a hairnet that matches the color of your hair. Now this is a very important step, so listen carefully. First put your fingers into the hole in the hairnet, then spread the hairnet out, be very careful not to rip it. Once you have done this, take the end of the hairnet and loop it around your bun, then twist the top of the hairnet and loop it around the bun again. Keep on doing this until there is no hairnet left. At the end there should be a little bit of hairnet left, tuck that underneath the bun. Now you are ready to pin your bun, don't worry if your hairnet doesn't turnout so well the first time, just keep on trying until you think it's right.
 |
These are the 'big' bobby pins you should use to pin your bun (company: bunheads) This photo was taken from http://www.danceskirts.biz |
Step 5) Pinning the bun. To complete this step you will need 10-20 small and big bobby pins, preferably ones that match the color of your hair. This is the step that determines your success, whether you shall accomplish the mission or not, I wish good luck, and remember it's not going to be easy, your hair may not survive the ordeal. Now if you wish to accomplish this task and defeats the bun, then continue on reading, if not than I suggest that you stop right here, and leave this blog completely. For those brave people continuing on then let's begin. Take a pin and put it in to the crest of your bun, do not push it in too much, but make sure it is secure. Continue doing this all the way sound the bun until your reach the point where you started. Your bun should resemble somewhat the shape of a circle or a square, if not then I reccommend you redo this step, until it does.
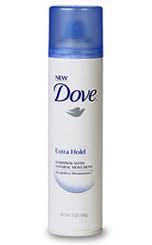 |
This is an example of the type of hairspray you should use to hairspray your bun. This photo was taken from: http://www.bellasugar.com |
Step 6) Hairspraying and adding any accessories that you want. To complete this step you will need a tin of hairspray, a fine tooth comb, ands the accessories you want. Simply sprays the hairspray around your head and comb back the wispy hairs, then add the accessories that you want by following the instructions given on the package that the accessory comes in. Congratulations you have accomplished the mission, and created a proper "Ballet Bun"!
Next week I will finally get to write about Frederic Ashton, for this very important topic has been covered. I hope you're all as excited as I am!
Yours Truly,
The Bloggy Ballerina
P.S. I have been doing my own bun for 4 years now, and I still have bumps in my ponytail, so don't worry if yours does. Good Luck!
 |
Here's what the final result of your bun should look like, don't worry if it doesn't. This photo was taken from: http://www.bunheads.com |
Your blog is really cool and I think a lot of people will want to be followers and post comments. Thanks for the helpful tips on buns and I will for sure try them on my hair the next time I have ballet by the my dog is a boy. I have question for you and you can answer by putting a comment on my blog. Do you plan to dance forever ? Can wait to hear your answer!
ReplyDeleteBrenna
Woah emily I was reading this blog post again and noticed that it was posted at 11:43pm!!!! GOOD GRAVY CHILD!! What where you doing up at this hour? Time certainly doesn't seem to affect your writing though this post is amazing and detailed as always. See you tomorrow at ballet!
ReplyDelete